Nuxt.js integrating with Socket.io(very simple)
Integrating Nuxt.js with Socket.io is straightforward and simple.

作者最近有Long Polling(長輪詢)需求, 看蠻多文章都GG
etc. nuxt-socket-io (This module is not yet compatible with Nuxt 3 ...)
所以決定自己重新整合一個環境, 採用前後端分離, 兼容性更高且好管理!!
Long Polling(長輪詢)需求的工具選擇
首先有比較熱門的Websocket(ws) 或 Socket.io 兩個選擇
Websocket沒有心跳檢測、自動重連、瀏覽器兼容性等等高級功能, 需要自己寫
Socket.io則是建立在Websocket上的一個Library,走自己的協議!!
因此需要有Socket.io Server 與Socket.io Client
Websocket則不需要,原生就可以建立自己的Server與Client!!
但考慮到擴充性與維護, 決定使用Socket.io 作為Long Polling(長輪詢)的選擇
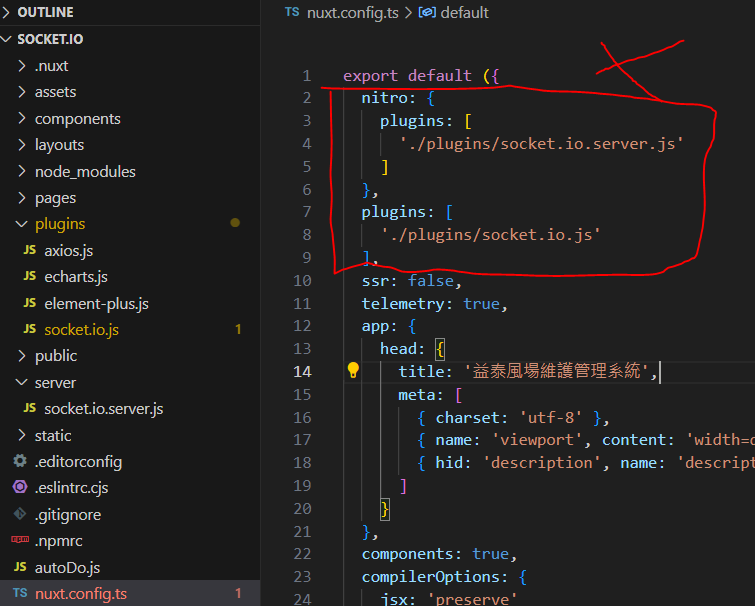
Do Not Use Nitro to Build Socket.io Server...
有作者有將Socket.io整合到Nitro, 但有一個問題!!!
使用Nuxt Build + Nuxt Start,Socket.io Server不會自己熱更新還會卡在後台
哈哈, 直接前後端分離比較方便維護與管理!!
好聽~~
Deployed Kit(部署套件)
# package.json / 主要套件4個
{
	"socket.io": "^4.7.5",
	"socket.io-client": "^4.7.5",
	"nuxt": "^3.11.1",
	"koa": "^2.15.2" (Option, 都可, 用你喜歡的HTTP Server即可)
}
Step1. Build a Socket.io Server
To set up a Socket.io server using Koa as the HTTP interface for clients to establish connections.
# ./server/socket.io.server.js
import { createServer } from 'http'
import { Server } from 'socket.io'
import Koa from 'koa'

// Defined Koa HTTP For Socket.io Server to be a Client Interface
const app = new Koa()
const httpServer = createServer(app.callback())
const socketServer = new Server(httpServer, {
  serveClient: false,
  cors: {
    origin: '*'
  }
})

// count Value
let count = 0

socketServer.on('connection', (socket) => {
  // 1. When Client Establishes A Connection, Update the current value of "total_count" to the Client
  socketServer.emit('total_count', count)

  // 2. Server Listen Client Trigger add_count Event
  socket.on('add_count', (msg) => {
    count = count + msg
    // 3. Server Update new_count For All Client
    socketServer.emit('total_count', count)
  })

  // Client disconnected
  socket.on('disconnect', () => {
    console.log('Client disconnected')
  })
})

// Active Server
httpServer.listen(3003, '0.0.0.0')

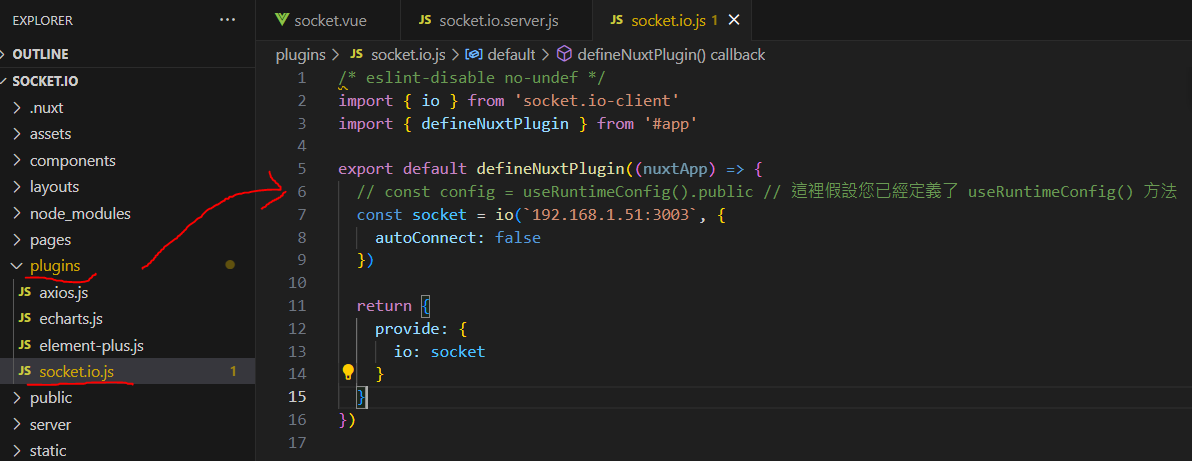
Step2. Create a global Socket.io Client in Nuxt.js
Register this.$io for Nuxt.js for global use!!
# ./plugins/socket.io.js
/* eslint-disable no-undef */
import { io } from 'socket.io-client'
import { defineNuxtPlugin } from '#app'

export default defineNuxtPlugin((nuxtApp) => {
  // const config = useRuntimeConfig().public // 這裡假設您已經定義了 useRuntimeConfig() 方法
  const socket = io(`192.168.1.51:3003`, {
    autoConnect: false
  })

  return {
    provide: {
      io: socket
    }
  }
})
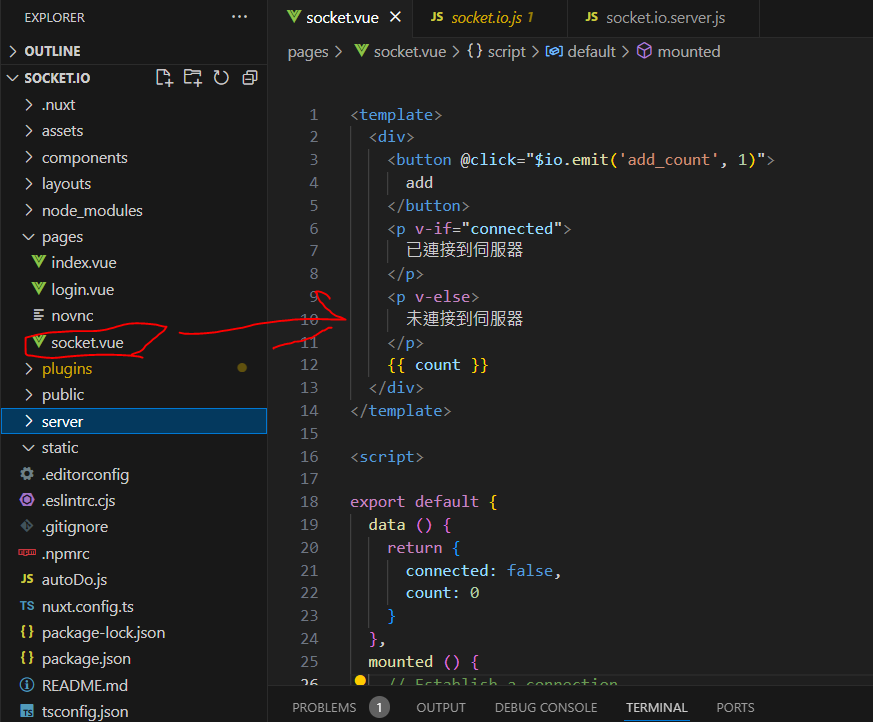
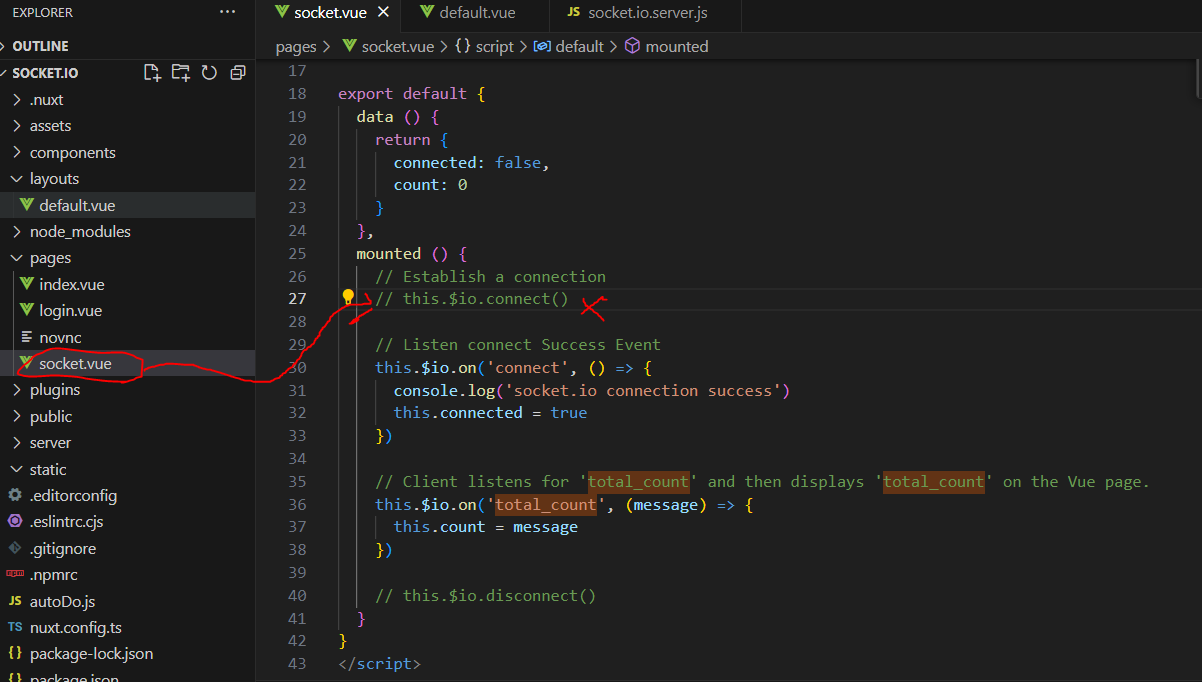
Step3. Use Socker.io Client in VUE
Use Socker.io Client to establish connection with Socker.io Server in VUE
# ./pages/socket.vue
<template>
  <div>
    <button @click="$io.emit('add_count', 1)">
      add
    </button>
    <p v-if="connected">
      已連接到伺服器
    </p>
    <p v-else>
      未連接到伺服器
    </p>
    {{ count }}
  </div>
</template>

<script>

export default {
  data () {
    return {
      connected: false,
      count: 0
    }
  },
  mounted () {
    // Establish a connection
    this.$io.connect()

    // Listen connect Success Event
    this.$io.on('connect', () => {
      console.log('socket.io connection success')
      this.connected = true
    })

    // Client listens for 'total_count' and then displays 'total_count' on the Vue page.
    this.$io.on('total_count', (message) => {
      this.count = message
    })

    // this.$io.disconnect()
  }
}
</script>
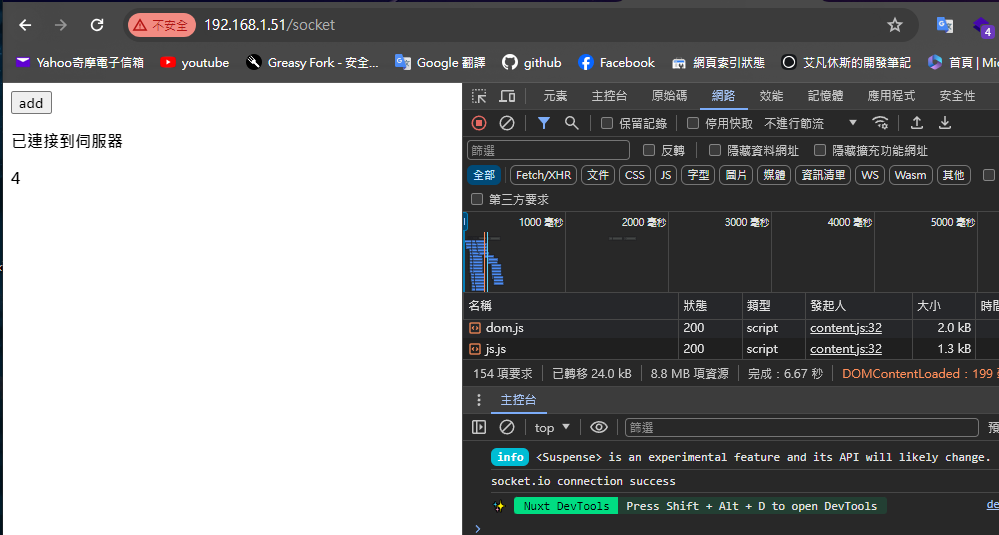
Start Socket.io
# socket.io server start(node.js)
node server\socket.io.server.js

# socket.io Client start(nuxt) / "dev": "nuxi dev --port=80 --host",
npm run dev
For One Page.
The current setup is establishing a connection per page.
If u need to use it on every page, layouts can be utilized.
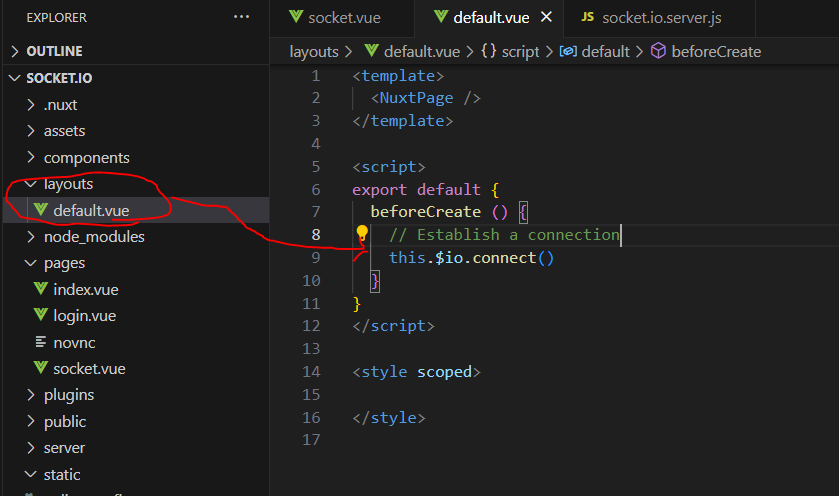
For ALL Page.
*Move this.$io.connect() to layout

Comments ()