Nuxt3-axios & proxy(Node.js 18)
使用Node.js 18在Nuxt3導入axios進行Proxy代理

寫這篇主要是因為升級Node.js版本出Bug了,所以順便寫一篇Nuxt3前後端分離
有爬過各種文章,例如: Nitro、Vite等內建Proxy,但因為涉及跨域CORS
因此建議在Nuxt3沒有完整的將Nitro與Vite還沒完全整合前,別搞自己XD
環境:
Node.js: 18.19.0
Frontend: Nuxt3+axios
Backend: Koa.js (後端不重要~~)
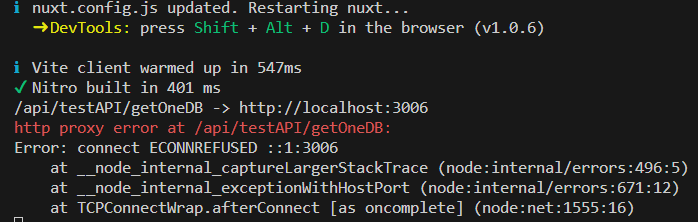
Node.js 18 With axios Show connect ECONNREFUSED
作者近期使用的Nuxt3 v3.7.0 版本升級成Nuxt3 v3.8.2
出現需要升級Node.js版本(16 to 18)
為了未來不要被搞,提前升級Node.js版本
但出現了...
解決方法
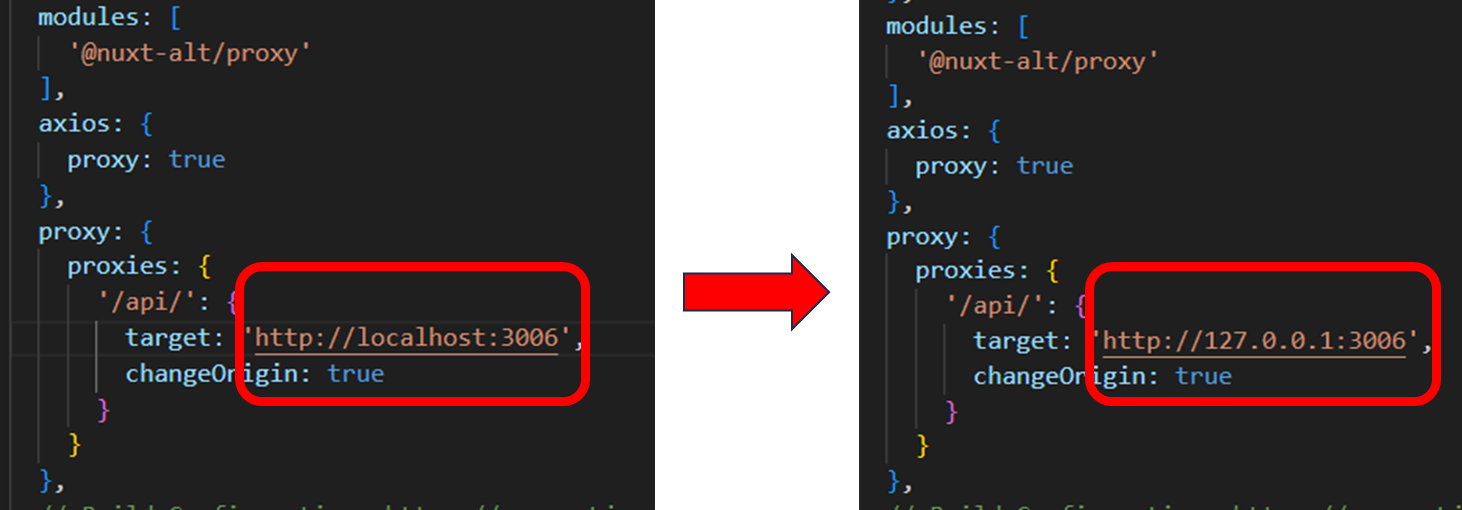
原來是Node.js v17開始,移除了localhost,必須更改為127.0.0.1
How To Use Nuxt3 With axios
這裡不會教如何安裝Nuxt3, 可以看我之前的文章或其他人的~~
Nuxt3加入axios需要設定2個地方
nuxt.config.js
plugins/axios.js
1. Nuxt3-環境
# install node.js
node.js version: v18.19.0
# Nuxt3使用axios必裝套件
@nuxt-alt/proxy
@nuxtjs/axios
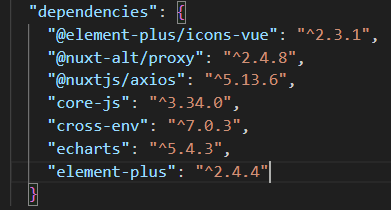
# Frontend package.json
"dependencies": {
"@element-plus/icons-vue": "^2.3.1",
"@nuxt-alt/proxy": "^2.4.8",
"@nuxtjs/axios": "^5.13.6",
"core-js": "^3.34.0",
"cross-env": "^7.0.3",
"echarts": "^5.4.3",
"element-plus": "^2.4.4"
}
2. Nuxt3-Plugins Add axios
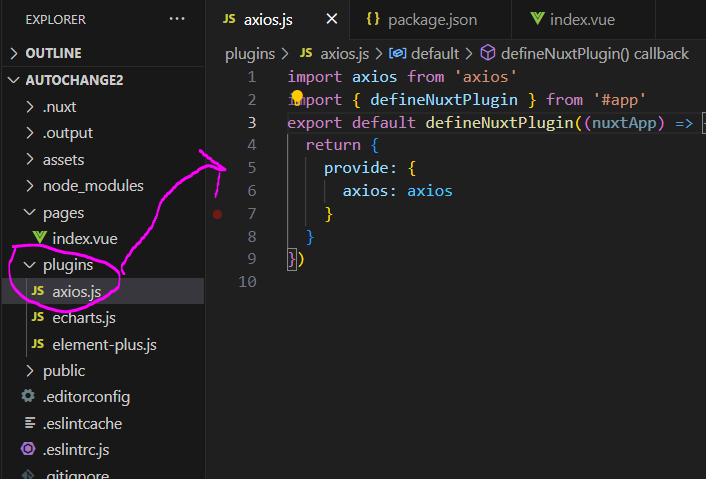
# Add axios.js to nuxt3 plugins

# yourPathFold/plugins/axios.js

import axios from 'axios'
import { defineNuxtPlugin } from '#app'
export default defineNuxtPlugin((nuxtApp) => {
  return {
    provide: {
      axios: axios
    }
  }
})

# 上面的代碼主要是將axios註冊為 this.$axios
# 前端就可以呼叫axios了!
# etc. await this.$axios.get('/api/testAPI/getOneDB')
3. Nuxt3-nuxt.config.js Add axios
使用@nuxt-alt/proxy進行代理


# yourPathFold/nuxt.config.js

export default defineNuxtConfig({
    modules: [
        '@nuxt-alt/proxy'
      ],
      axios: {
        proxy: true
      },
      proxy: {
        proxies: {
          '/api/': {
            target: 'http://127.0.0.1:3006',
            changeOrigin: true // 允許cors跨域
          }
        }
      }
})

# 註冊@nuxt-alt/proxy模組, 並開啟axios proxy
# '/api/' => 觸發url redirect的關鍵字
# changeOrigin => appear CORS
# target=> Target Server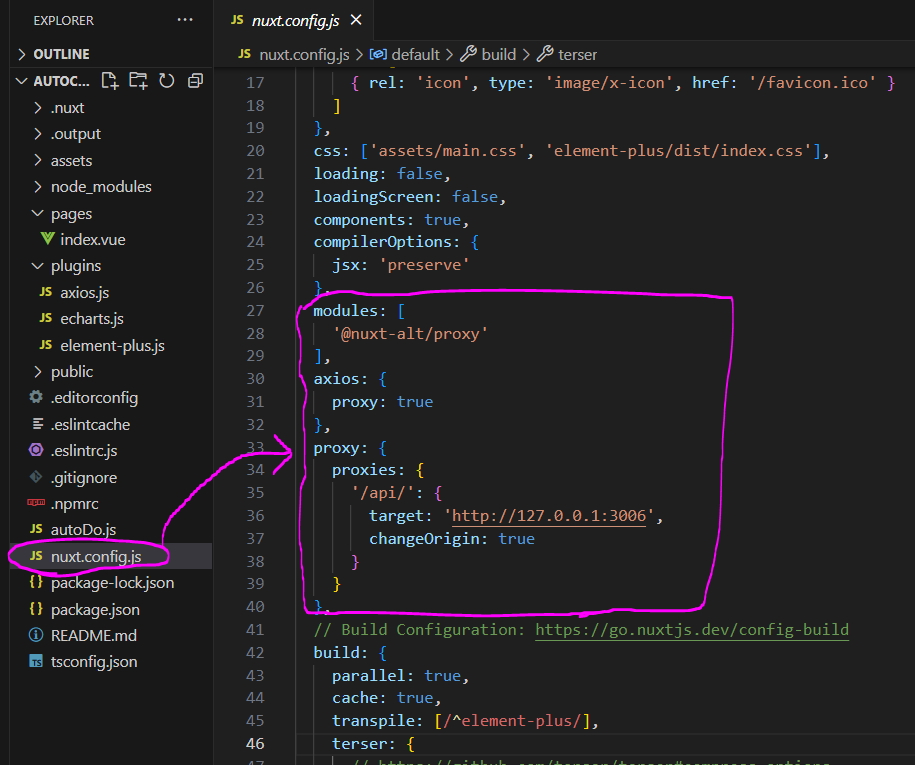
4. Nuxt3- VUE Page Test
# index.vue
<template>
  <div>
    {{ clearnow.data }}
  </div>
</template>
<script>
export default {
  data () {
    return {
      clearnow: ''
    }
  },
  mounted () {
    this.writeself()
  },
  methods: {
    async writeself (state) {
      this.clearnow = await this.$axios.get('/api/testAPI/getOneDB')
      this.$message({
        message: 'Data Async',
        type: 'success'
      })
    }
  }
}
</script>
<style scoped>
</style>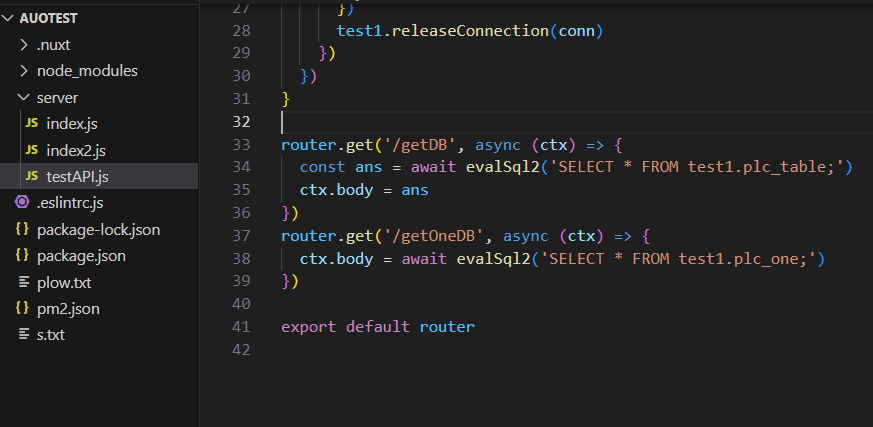


Proxy代理的運作流程
-
For Example
backend server ip: 0.0.0.0
backend server port: 3006
backend api: http://192.168.1.50:3006/api/testAPI/getOneDB -
Vue With Proxy
vue page axios: await this.$axios.get('/api/testAPI/getOneDB') -
Front Request
frontend: http://192.168.1.50/api/testAPI/getOneDB
這樣一來,使用者只知道前端的Server IP,不知道後端的Server IP~~
總結
axios配合proxy代理,讓this.$axios能夠省略呼叫api的host帶入
etc.
no proxy: this.$axios.get('http://192.168.1.50:3006/api/testAPI/getOneDB')
proxy: this.$axios.get('/api/testAPI/getOneDB')
掛Proxy代理的好處為:
1. 當我需要變更Server的IP時,不需要去每個Page調整URL的Host IP...(很蠢XD)
2. 使用者只知道Forntend的Server IP


Comments ()